Email Access and Setup
WebMail Applications
You can point any browser to either of these clients to access the email
- RoundCube: https://mail.noinfo.com
- SoGo : https://mail.noinfo.com/SoGo
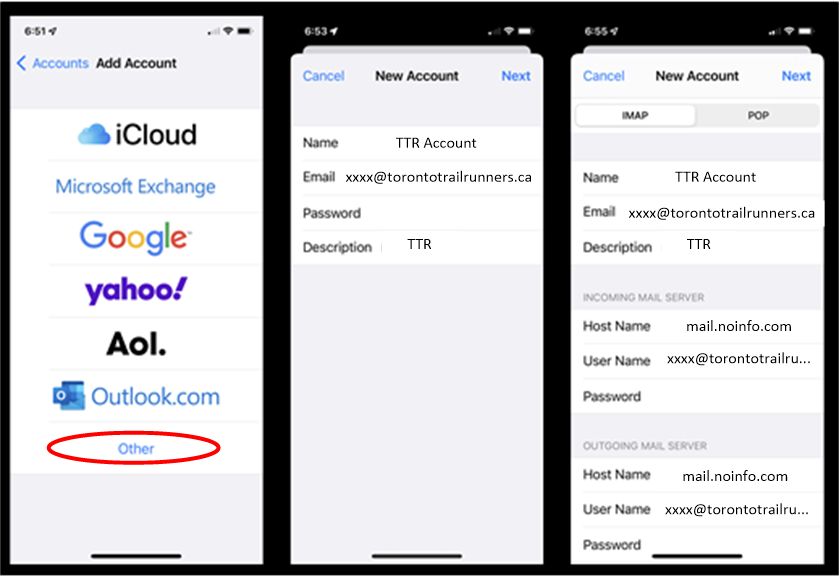
Apple/iOs Setup
- For iPhone go to ‘Settings’ -> ‘ Mail’ -> ‘Add Account’
- Then select ‘Other’
- Then select ‘Add Mail Account’
- Then Enter Name, Email, Password and Description like in the second image.
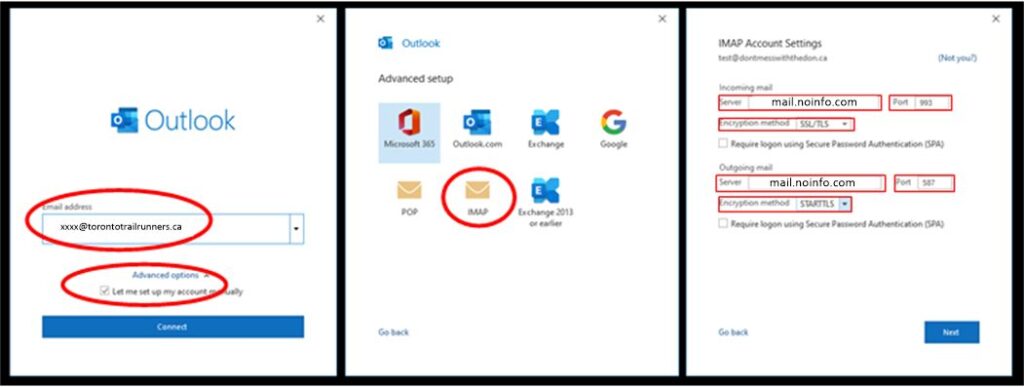
- Enter your email address and select ‘Let me set up my account manually’
- Then click connect and select ‘IMAP’
- Fill in the information as in the third image.
Incoming Mail Server:
Host Name: mail.noinfo.com
User Name: [ full email address / xxxx@torontotrailrunners.ca]
Password : ************
Outgoing Mail Server:
Host Name: mail.noinfo.com
User Name: [ full email address / xxxx@torontotrailrunners.ca]
Password : ************
- Then click next and save.
Outlook Setup
- For Outlook Setup, click ‘File -> Add Account ‘
- Enter your email address and select ‘Let me set up my account manually’
- Then click connect and select ‘IMAP’
- Fill in the information as in the third image.
Incoming Mail:
Server: mail.noinfo.com Port: 993
Encryption Method: SSL/TLS
Outgoing Mail:
Server: mail.noinfo.com Port: 587
Encryption Method: STARTTLS
- Then click next and enter the password when prompted.
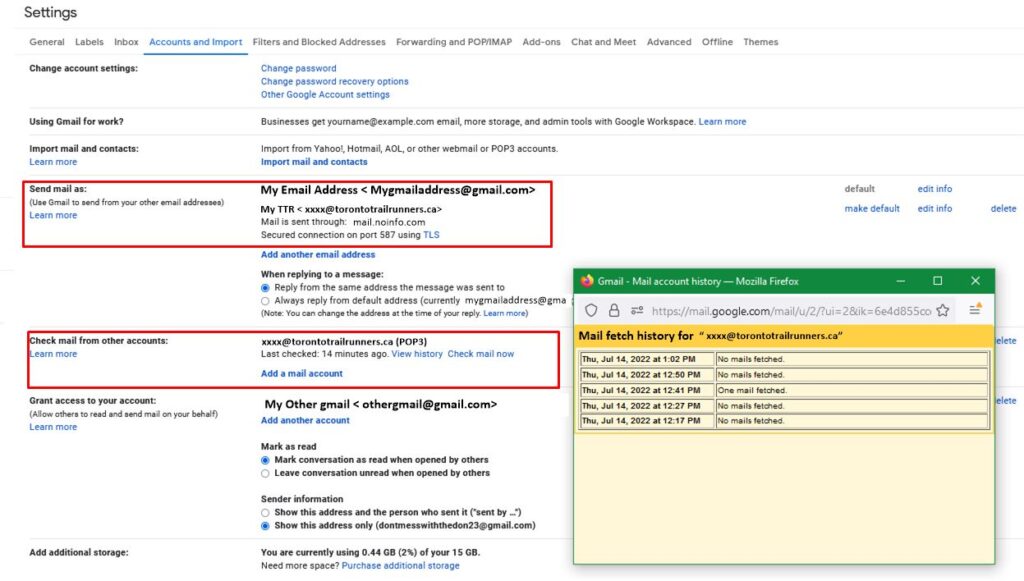
GMAIL Access Setup
Setup your Gmail account to access, receive and send emails from TTR.
- Inside your personal Gmail account click the cog in the upper right-hand corner and select ‘See All Settings’, then click ‘Accounts and Imports’
- Go down to the section labelled ‘Check mail from other accounts:’ and select ‘Add a Mail Account’
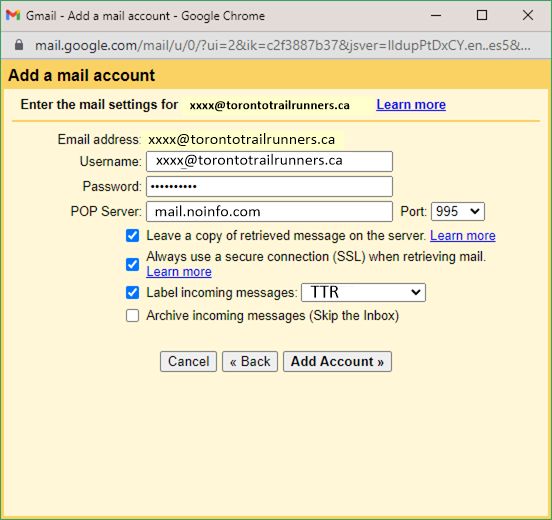
- In the newly opened window add your TTR email address like ‘xxx@torontotrailrunners.ca’, and click Next and Next again till you see the window below and fill in the following:
- Username: [ full email address / xxxx@torontotrailrunners.ca ]
- Password: Your password
- POP Server: mail.noinfo.com Port: 995
- Check :
- ‘Leave a copy of retrieved messages on the server ( if you access from other methods)
- Always use SSL
- Label incoming messages (add new label TTR)
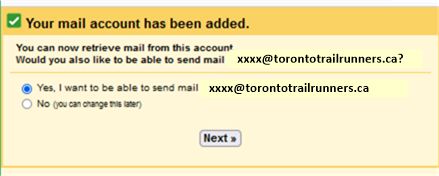
This will add the account and then ask if you want to also be able to send mail as such. Click next to move on to the next pages to set up sending.
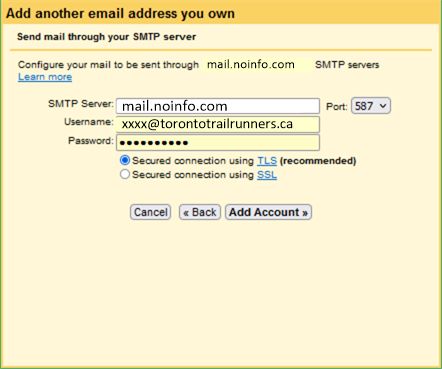
- In the next window please fill out the following:
- SMTP Server: mail.noinfo.com Port: 587
- Password: Your password
- Check :
- Check: ‘Secured connection using TLS’
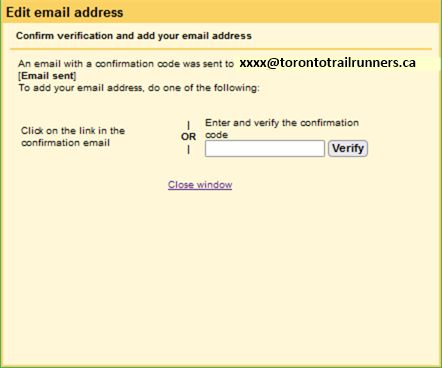
Then click ‘Add Account’ to move to the validation page where you will need to put in a code sent to your TTR email.
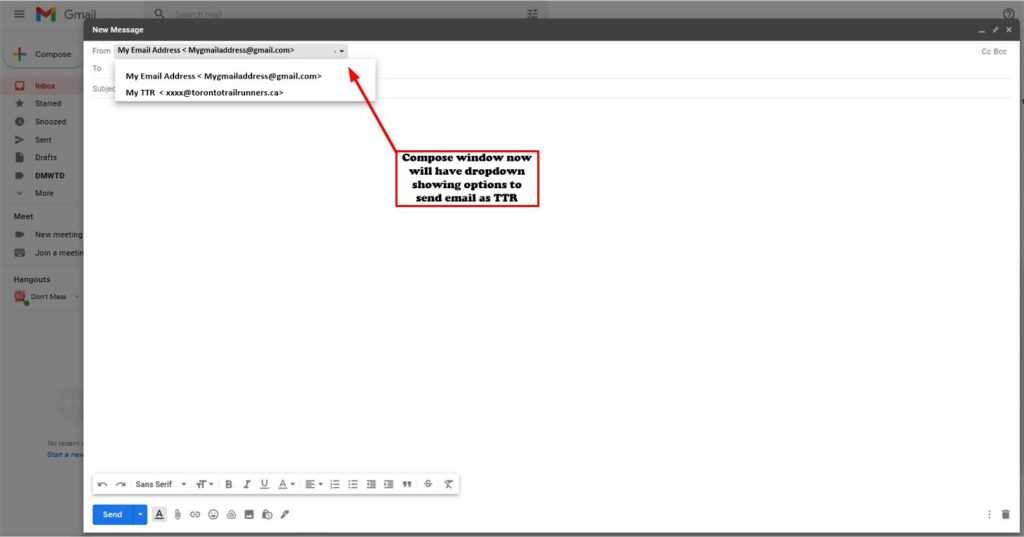
You should now see in settings that email is being retrieved from the server and you should see that all emails from TTR are tagged with the label TTR. Also when sending an email you will be able to use the dropdown box to send as TTR. See below for screenshots showing this.